Для правильной установки TXV необходимы правильный клапан и отверстие., надежный контакт колбы и точная обратная связь по давлению. Неправильная установка может привести к медленному охлаждению., нестабильный перегрев или обратный поток жидкости. Повторные регулировки клапанов редко решают эти основные проблемы..
В этом руководстве описаны новые установки и замены ТРВ в холодильных камерах с прямым испарением.. Следуйте инструкциям по конкретному оборудованию и клапанам для трубопроводов., способы подключения и пределы приема.
Безопасность: Эту работу должны выполнять только квалифицированные специалисты по холодильному оборудованию.. Заблокировать электроэнергию, при необходимости восстановите хладагент и подтвердите безопасные условия давления перед открытием системы.. Для легковоспламеняющихся хладагентов, соблюдать специфическую для системы вентиляцию, процедуры обнаружения утечек и контроля воспламенения.
Понимание схемы установки TXV
В типичном многоконтурном испарителе, Хладагент проходит через ТРВ и распределитель перед тем, как попасть в контуры испарителя.. Чувствительная груша контролирует выпускную всасывающую трубу.. Внешний эквалайзер обеспечивает обратную связь по давлению из соответствующей области выпускного отверстия..

Фигура 1. Концептуальная компоновка одного испарителя с внешним выравниванием. Следуйте чертежу оборудования для фактической прокладки и соединений..
| Компонент | Функция | Проверка установки |
|---|---|---|
| ТХВ | Дозирует хладагент в испаритель | Подтвердить модель, направление потока и доступ к сервису |
| Распределитель | Распределяет хладагент между контурами. | Проверьте сопло, количество цепей и ориентация |
| Чувствительная лампочка | Отслеживает температуру выпускной трубы | Проверить местоположение, контакт, ремни и изоляция |
| Внешний эквалайзер | Передает давление всасывания на клапан | Подтвердите источник давления и чистоту соединения. |
| Тестовые точки | Поддержка проверок температуры и давления | Сопоставьте места измерения и разрешите повторное тестирование. |
Уведомление: Сенсорная лампочка не измеряет температуру в помещении. Его капиллярная трубка и внешний эквалайзер выполняют разные функции.; никогда не меняйте их местами.
Обратный клапан и соответствующие компоненты
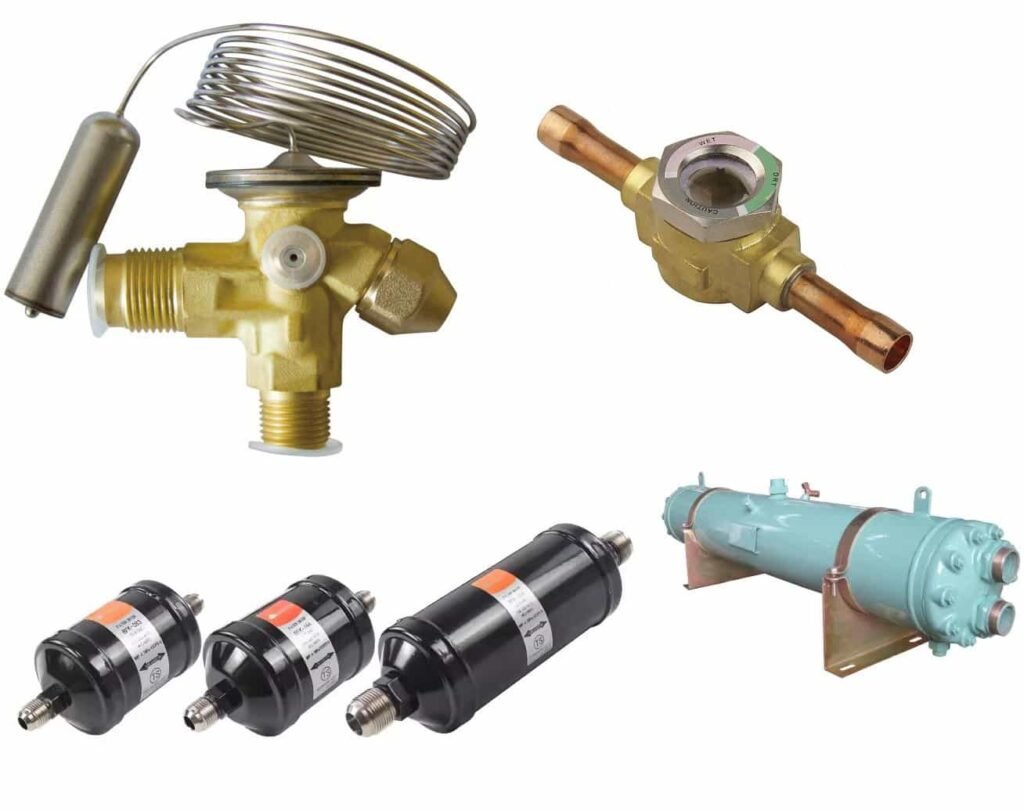
Соответствующие размеры соединений не гарантируют совместимость.. В некоторых TXV используются сменные отверстия., поэтому один корпус клапана может обслуживать несколько мощностей.

| Элемент | Подтверждать | Избегать |
|---|---|---|
| Хладагент | Точная совместимость хладагента | Предполагая, что в аналогичных хладагентах используется один и тот же клапан. |
| Приложение | Диапазон испарения и режим охлаждения/морозильной камеры | Подмена среднетемпературной конфигурации без проверки |
| Клапан и отверстие | Полная модель и код отверстия | Проверка только корпуса клапана |
| Выравнивание | Внутренняя или внешняя обратная связь по давлению | Отказ от подключения внешнего эквалайзера |
| Емкость | Нагрузка, Условия жидкости на входе и доступный перепад давления | Выбор только по мощности компрессора |
| Заряд элемента | Область применения и любые функции MOP | Игнорирование суффиксов модели |
| Соединения | Размер, тип соединения и номинальное давление | Воспринимать физическое соответствие как одобрение |
| Распределитель | Тело, расположение сопел и контура | Предполагая, что старый распределитель подходит для каждого заменяемого клапана. |
Для запроса на замену, предоставьте заводскую табличку старого клапана, идентификация отверстия, хладагент, модель испарителя и расчетные условия. Одна только фотография клапана может не определить правильную замену..
Уведомление: Продолжаем выбирать поставщика? Изучите наш Обзор производителя ТРВ, затем проверьте совместимость хладагента, наличие диафрагмы и техническая поддержка для вашего применения.
Внутренний против. Внешнее выравнивание
| Тип клапана | Источник давления | Основное соображение |
|---|---|---|
| Внутренне уравновешенный TXV | Выход клапана через внутренний проход | Поддерживайте падение давления в испарителе в пределах, установленных производителем. |
| TXV с внешним выравниванием | Рядом с выходом испарителя через отдельную линию | Учитывайте падение давления в испарителе и распределителе. |
Распределитель и его трубки увеличивают перепад давления.. Для обычной схемы TXV/распределителя, описанной в этом руководстве., используйте внешнее выравнивание, как того требует производитель оборудования. Никогда не закрывайте порт внешнего эквалайзера и не эксплуатируйте клапан..
Установите корпус клапана и соединения

Подтвердите направление потока и доступ
Следуйте стрелкам клапана и инструкциям модели.. Не делайте вывод о направлении потока по форме корпуса и не предполагайте, что каждый TXV поддерживает обратный поток..
Оставьте место для доступа к регулировочной крышке и обслуживаемым деталям.. Для моделей со сменными отверстиями, оставьте достаточный зазор для будущей замены.
Предотвратите механический стресс
Поддерживайте трубопровод, чтобы клапан не выдерживал веса трубы или напряжения выравнивания.. Избегайте принудительной установки соединений на место.
Прокладывайте капилляр колбы без резких изгибов., напряжение или контакт с абразивными краями. Никогда не тяните за капилляр, чтобы переместить лампочку..
Используйте правильный метод подключения
| Связь | Ключевые проверки |
|---|---|
| Вспышка | Качество факела, очистить уплотнительные поверхности, выравнивание и заданный крутящий момент |
| паяный | Совместимые материалы, контроль тепла и внутренняя чистота |
| Исправный фитинг | Правильные уплотнения, последовательность сборки и способ затяжки |
Используйте продувку сухим азотом в соответствии с утвержденной процедурой пайки.. Не допускайте попадания загрязнений в контур хладагента.. Никогда не проводите испытания под давлением с кислородом..
Следуйте инструкциям по разборке клапана., термозащита и подготовка швов. Различные конструкции клапанов могут требовать разных методов.; не применяйте одну процедуру влажного обертывания или нагревания к каждой модели.
Правильно установите чувствительную лампочку
Колбе необходим прочный тепловой контакт с всасывающей трубой.. Изоляция не может компенсировать незакрепленную лампочку или воздушный зазор..
Выберите подходящую секцию выпускной трубы
Предпочитайте подходящую прямую, Горизонтальная всасывающая секция возле выхода испарителя. Совместите колбу с трубой и избегайте мест, в которых собирается жидкость или масло..
Держите лампу вдали от внешних источников тепла и крупных компонентов, которые могут исказить ее температурный отклик.. Не перемещайте его после теплообменника на всасывающей линии, который добавляет тепло за пределы выхода испарителя..
Следуйте положениям часов для конкретной модели
Прежде чем выбирать положение часов, проверьте наружный диаметр трубы и инструкции по клапану..
Например, в некоторых инструкциях Danfoss T2/TE2 указаны места монтажа из 1 к 4 часов или 8 к 11 час. Применяйте эти инструкции только к продуктам и условиям, которые они охватывают..

Установка сенсорной лампы TXV
Не превращайте отдельное положение часов или пороговое значение диаметра трубы в универсальное правило.. Избегайте нижней части всасывающей трубы., где масло и жидкость могут повлиять на показания.
Проверьте приложения с вертикальными трубами отдельно
Положения часов на горизонтальной трубе не определяют требования к вертикальному монтажу.. Проверьте, допускает ли производитель фактическое направление потока и расположение..
Некоторые направляющие Sporlan допускают опускание вертикальной всасывающей секции при определенных условиях.. Это не одобряет каждый стояк, ловушка или вертикальное расположение.

Проверить контакт, Монтаж и изоляция

Фигура 2. Проверьте контакт лампы перед добавлением изоляции.. На этом виде сбоку не указано положение монтажных часов..
| Проверять | Правильная практика | Корректирующие действия |
|---|---|---|
| Контактная поверхность | Чистая трубка и полный контакт лампочки. | Удалить загрязнения и устранить пробелы |
| Монтаж | Ремни или зажимы, указанные производителем. | Закрепите любую лампочку, которая скользит или вращается. |
| Изоляция | Соблюдайте требования к покрытию и влагозащите. | Устранение зазоров, свободные участки или влажная изоляция |
| Окружение | Минимизация внешнего теплового воздействия | Обзор ближайших обогревателей, горячие трубы и большие фитинги |
| капиллярный | Поддерживайте плавность, поддерживаемый маршрут | Правильное натяжение, риск изломов и истирания |
В системах с несколькими испарителями, каждая лампочка должна иметь собственный выход испарителя.. Не перемещайте лампы на общий всасывающий коллектор без одобрения проекта..
Подключите внешний эквалайзер
Уравнитель должен обеспечивать давление, соответствующее линии всасывания в месте расположения баллона..
Обычно подключение осуществляется рядом с лампой и сразу за ней.. В некоторых конструкциях оборудования вместо этого используется подходящий коллектор или обратное колено..
| Состояние сайта | Что проверить |
|---|---|
| Регулятор давления испарителя возле выхода | Снимайте давление со стороны испарителя, как того требует конструкция. |
| Несколько испарителей имеют общий всасывающий коллектор. | Подтвердите эталонное давление для каждого контура. |
| Кран эквалайзера расположен далеко от лампочки | Оцените потерю давления между двумя точками. |
| Линия эквалайзера перекручена или засорена. | Восстановите путь давления перед регулировкой клапана. |
| Внешний порт не имеет соединения | Завершите необходимое подключение; никогда не работайте с ограниченным портом |
Уведомление: Проверьте соотношение давлений, дело не только в том, стоит ли кран до или после лампочки. Клапан регулирования давления или значительные потери в линии между точками могут сделать обратную связь недействительной..
Установите и проверьте распределитель хладагента
Распределитель распределяет смесь хладагента между параллельными контурами испарителя.. Его сопло, трубы и рабочая нагрузка влияют на распределение.
Для получения информации о работе и конструкции, прочитайте наше руководство по Функция и типы распределителя хладагента.

Всегда ли дистрибьютору нужно указывать вниз??
Нет. Следуйте инструкциям конкретного распределителя и испарителя..
Некоторые дистрибьюторы Sporlan допускают несколько ориентаций.. Вертикальная подача вверх или вниз может улучшить производительность в различных условиях., в зависимости от конструкции и подключения TXV.
Не изменяйте одобренную компоновку трубопроводов просто для того, чтобы принудительно сориентировать их вниз..
Проверьте форсунку и распределительные трубки.
| Элемент | осмотр |
|---|---|
| Сопло | Подтвердить идентификацию, размер и правильная сборка |
| Подключение TXV к распределителю | Сохранить указанное расположение; избегайте несанкционированных разгибаний или локтей |
| Распределительные трубки | Проверьте количество цепей, диаметр, длина и маршрутизация |
| Пути потока | Ищите раздавленные трубки, засорение припоя или заглушки розеток |
Длина трубки влияет на производительность и падение давления.. Не сокращайте одну ветку только для упрощения маршрутизации., или перепутать отверстие TXV с патрубком распределителя.
Если цепи показывают разные схемы замерзания, исследовать поток воздуха, нагрузка и распределение перед увеличением потока TXV.
Завершите предпусковые проверки
Не запускайте систему сразу после подключения клапана..
| Проверять | Подтвердите перед запуском |
|---|---|
| Тестирование на утечки | Выполните указанный тест и запишите результат |
| Эвакуация и обезвоживание | Соответствие требованиям к оборудованию и проверка эффективности вакуумного удержания |
| Хладагент | Подтвердить хладагент, порядок зарядки и запись зарядки |
| Трубопроводы и клапаны | Проверьте рабочие положения, уплотнительные колпачки и опоры |
| Электрическая система | Проверьте поставку, проводка, защита и заземление |
| Испаритель | Проверьте вентиляторы, очистка и дренаж воздушного потока |
| Элементы управления | Проверьте температуру, разморозить, настройки задержки вентилятора и сигнализации |
| Инструменты | Подтвердите контрольные точки, единицы выбора хладагента и давления |
Не копируйте испытательное давление, пределы эвакуации или объемы загрузки из другой холодильной камеры. Используйте требования к этой системе.
Проверьте начальную работу и восстановление после разморозки.
Падение комнатной температуры подтверждает охлаждающую активность., но это не доказывает правильность управления TXV в различных условиях эксплуатации..
Оцените каждый этап работы
| Этап | Наблюдать | Избегать |
|---|---|---|
| Запуск и выключение | Тенденции давления, охлаждение, работа вентиляторов и компрессоров | Установка окончательного перегрева из снимка запуска |
| Репрезентативная постоянная нагрузка | Перегрев на выходе, подача жидкости и стабильность | Проверка комнатной температуры самостоятельно |
| Рядом с заданным значением | Управление при низкой нагрузке и езда на велосипеде | Рассмотрение теста в пустой комнате как валидации при полной нагрузке |
| Восстановление оттаивания | Время капания, перезапуск вентилятора, индикаторы подачи жидкости и обратного потока | Принятие задержки управления за неисправность компонента |
После электрического размораживания, контроллер может отключать вентиляторы во время стекания капель или охлаждения змеевика.. Проверьте последовательность управления перед диагностикой неисправности вентилятора или TXV..
Соблюдение интервалов разморозки, условия завершения и время капания на оборудование и применение. Избегайте универсальных настроек.
Согласование измерений температуры и давления
Запишите температуру трубы и соответствующее давление возле выхода испарителя.. Определите хладагент, единицы измерения давления и точные места проведения испытаний.
Не объединяйте давление на входе компрессора с температурой на выходе удаленного испарителя без оценки потери давления во всасывающей линии..
Для расчетов и процедур настройки, см. наш Руководство по регулировке перегрева TXV и устранению неполадок.
Корректируйте только тогда, когда результаты оправдывают это
Новый TXV может работать правильно без регулировки на месте.. Сначала подтвердите совместимость клапана, монтаж, поток воздуха и подача жидкости.
Если оборудование требует изменения настроек, следуйте процедуре, специфичной для клапана, зарегистрируйте настройку и дайте системе стабилизироваться. Никогда не используйте регулировку для маскировки неисправности трубопровода или источника питания..
Устранение неполадок после установки
Используйте симптомы для проведения осмотра, не идентифицировать неисправный компонент самостоятельно.
| Симптом | Первые проверки | Избегать |
|---|---|---|
| Плохое охлаждение и высокий перегрев. | Измерения, подача жидкости, ограничения, клапан и отверстие | Немедленное увеличение потока TXV |
| Низкий перегрев | Расход воздуха, нагрузка, контакт мороза и лампочки | Диагностика обратного наводнения только по причине замерзания трубы |
| Колебания давления и перегрев | Загрузить изменения, Реакция лампочки, размер клапана и стабильность подачи | Повторные регулировки вперед и назад |
| Низкое давление всасывания после замены. | Спецификация замены и весь жидкостный тракт | Замена ТРВ повторно без диагностики |
| Проблемы только после разморозки | Задержка вентилятора, восстановление корма, обогрев и управление лампочками | Настройка перегрева во время переходного процесса |
| Неравномерная работа схемы | Распределение воздушного потока, распределительные и патрубки | Предполагая, что TXV вызывает каждый дисбаланс |
Если компрессор стучит, вероятно сильное наводнение, или устройства защиты периодически срабатывают, следуйте процедуре отключения оборудования и исследуйте. Не продолжать пробную корректировку.
Запишите результаты установки и ввода в эксплуатацию
Используйте следующие записи для передачи. Введите критерии приемки из документации на оборудование; формы не определяют универсальные пределы.
Запись об оборудовании и установке
| Элемент | Записывать |
|---|---|
| Проект, дата и техник | ______ |
| Модели конденсационных агрегатов и испарителей | ______ |
| Хладагент и данные о заправке | ______ |
| Модель TXV и код отверстия | ______ |
| Распределитель, количество сопел и контуров | ______ |
| Расположение лампы, диаметр трубы и ссылка на фото | ______ |
| Расположение эквалайзера и ссылка на фото | ______ |
| Результаты испытаний на герметичность и эвакуации | ______ |
| Руководство по установке и его версия | ______ |
Эксплуатационные измерения
Заполните отдельную запись для каждого испарителя или независимого контура..
| Элемент | Выдвижение вниз | Постоянная нагрузка | Восстановление после разморозки |
|---|---|---|---|
| Время, температура окружающей среды и комнатная температура | ______ | ______ | ______ |
| Загрузка продукта и активность двери | ______ | ______ | ______ |
| Давление на выходе испарителя и единицы измерения | ______ | ______ | ______ |
| Температура трубы в соответствующем месте | ______ | ______ | ______ |
| Соответствующая температура насыщения | ______ | ______ | ______ |
| Перегрев на выходе испарителя | ______ | ______ | ______ |
| Место проверки подачи жидкости и переохлаждения | ______ | ______ | ______ |
| Вентилятор, статус разморозки и сигнализации | ______ | ______ | ______ |
| Изменения и последующие чтения | ______ | ______ | ______ |
Статус передачи
- Критерии приемки и ссылка на документ: ______.
- Условия эксплуатации, проверенные техническим специалистом: ______.
- Условия, которые все еще требуют тестирования: ______.
- Выдающаяся работа и дата последующего наблюдения: ______.
- Подписание технического специалиста и клиента: ______.
Если сайт не может поддерживать тест с полной нагрузкой, записывать «Ожидается проверка полной загрузки». Не требуйте полной проверки от частичного теста.
Часто задаваемые вопросы по установке TXV
Q1. Должна ли лампа сидеть 1.5 Метры от компрессора?
Универсального расстояния не существует..
Выберите место, соответствующее выходу испарителя, и следуйте инструкциям по оборудованию и клапану..
Q2.Может ли капилляр лампы заменить внешний эквалайзер??
Нет. Капилляр передает давление внутри чувствительного элемента..
Уравнитель передает давление в системе на клапан.. Держите их функции и соединения отдельно.
Q3. Можете ли вы передать систему после успешного испытания на утечку??
Еще нет.
Проверка операционной эффективности и соответствующих средств контроля, затем запишите результаты и любые ограничения теста..
Q4. Что вам следует отправить для удаленной технической поддержки??
Предоставьте паспортные таблички клапана и испарителя., сведения о хладагенте, общие фотографии трубопроводов, лампочка и эквалайзер крупным планом, и измерения с местами испытаний.
Если проблема возникает только во время понижения, восстановление при низкой нагрузке или разморозке, укажите это время и статус контроллера. Одна только фотография манометра редко дает достаточно информации..
Заключение
Сопоставьте компоненты, установить точную обратную связь по температуре и давлению, и проверить работу в соответствующих условиях. Ведите четкие записи, чтобы установщики и сервисные группы могли отличать ошибки установки от нагрузки., проблемы снабжения и контроля.